BUTTERFLY DISPLAY
Before going forward I feel obliged to remind you that when it comes to crafts, there are many that are affordable and even more that can have cost friendly options to save money. However, there are those craft projects where the cost can get high and this is one of this projects. At a min you might spend $30-$50 USD to complete this project. Along the way, I will share lessons learned including ways you could possible save money or over go wild pending your preference.
I had seen butterfly displays off and on for years as this by no means is a new idea. They vary from fake to real butterflies (more details below) and minimal to elaborate. One day while cruising the rows at Hobby Lobby in the floral section, I saw on of their idea pages that gave me an idea.
Like may projects, just because I have an idea, doesn't mean I know where to start and or start right away. Some take many days of searching Pinterest, Etsy, and other sources to fill in the blanks before I pull the trigger and get started, and this was one of those projects. So I started researching and here are a few things to keep in mind.
Real or Fake? The main difference, cost, where to buy them, and taking the ewe out of taxidermy.
I’d like to the opportunity to change your mind when it comes to the word TAXIDERMY. When the word taxidermy comes to mind, it might not bring the happiest of thoughts. Taxidermy by definition is the art/ practice of preparing and displaying a dead animal. Since the butterflies I used in this project were once alive, this does fall under a branch of taxidermy. None the less, the end result will have you saying “Wow” vs “ew, gross”.
If you are not comfortable with real butterflies, there are options for fake butterflies. You can walk into most craft stores and find fake butterflies you can purchase. They are available online as well. You may just be limited to orange or a few other colors options.
Cost is a big variable when considering real or fake. When it comes to fake butterflies, you can often get 6-12 for about $1 +/- a butterfly. Real butterflies are mostly sold singularly but can be bundled pending the seller you buy from. I have purchased all the real butterflies I use from sellers on Etsy and I only purchase from sellers who sell ETHICALLY SOURCED butterflies. This generally means one of two things. They either find butterflies who died naturally and sell them OR they come from butterfly farms. If this is important to you and you are unsure by reading the product description, message the seller who should be able to confirm.
On Etsy (US specifically), most butterflies are sold folded or unfolded and graded by quality, additional options vary by seller. Folded butterflies are more affordable but on the flip side require you to rehydrate them and spread their wings once you have received them. You can find video’s on YouTube that explain the process and man they make it look easy. I can tell you from experience, it’s harder than you may expect, takes patience and time, and you should invest in ‘cheep’ test butterflies (as recommended in the video) to learn on before using the butterfly you plan on using for your project. Rehydrating also can cost more initially as it requires gloves, sterile injection needles, tweezers, butterfly boards, and possibly other tools to unfold your butterflies DIY style. Folded butterflies tent to start between $6-$15 USD per butterfly, and pending the grade and rarity, can go much much higher in cost.
Knowing what it takes to unfold a butterfly on your own, unfolded butterflies can be a more desirable option but naturally a more expensive one. A butterfly that might sell for $12 USD with it’s wings folded, might sell for $25 with it’s wings unfolded. On average, the cost is about double. The displays I have made have included 2-3 butterflies which means you could be spending $12-$36 USD +tax and shipping just for butterflies alone.
TIP: When rehydrating, the bigger the butterfly, the easier to work with. The better quality butterfly the higher the grade and more expensive. Missing an antenna means lower quality, lesser grade, and less expensive.
Fast forward, it’s the holidays and my family decided on going the secret Santa rout and I knew out of everyone, the person I got would appreciate a DIY gift as she was my biggest fan in prior years. I purchased about a half dozen folded butterflies along with 2 unfolded butterflies, most were green in color as that was my secret Santa’s favorite color. From there I had to think of the overall look I wanted to end with and what it would take to make that happen. As mentioned at the beginning I’ve seen displays that are just butterflies while others have more of a nature feel to them and I decided to go more of the nature rout tied to the original inspiration found at Hobby Lobby.
As a part of this natural style, I decided to go deeper into the unknown and work with Sola wood flowers for the first time and dye them to match the vibes I was trying to achieve. So while waiting for butterflies to arrive I purchased a variety of sola wood flowers from Hobby Lobby and associated supplies to dye them at home. You can check out the detailed blog here for all the details. Overall, the process was fun and a good beginner project but adds cost.
If you are looking for a similar look but at a cheeper cost and no DIY, you can find simple floral bundles on Amazon (picture and link off to the right).
Time to Assemble !
Assembling the items under the dome wasn’t hard but I learned a few things. If you are like me, always measure or know your measurements before you purchase a dome. Most domes are 4-6 inches wide and pending the size of your butterfly, lets just say, a few of mine were a little snug. Glueing everything was another variable to figure out. Being that I wanted this to last, I didn’t use hot glue but the biggest benefit to hot glue is time, it heats up fast and dries fast. Most other glues have different dry and cure times and some are to your favor if you don’t want to be holding items waiting for them to dry for hours.
For the floral foam, moss, sola wood flowers, and grape wood, I used 700 glue. Although slightly smelly, it doesn’t take forever to dry and cures overnight. To attach the butterfly to the acrylic dowels, I used the same silicon sealant as I do for the dome. It’s a strong adhesive once fully dried/ cured, water proof, and mold free.
When trying to achieve your overall look, less is more, and take advantage of the height of the dome. Once you have the achieved look, it’s time to clean the glass part of your dome display and then use the silicon sealant around the bottom to make it air tight.
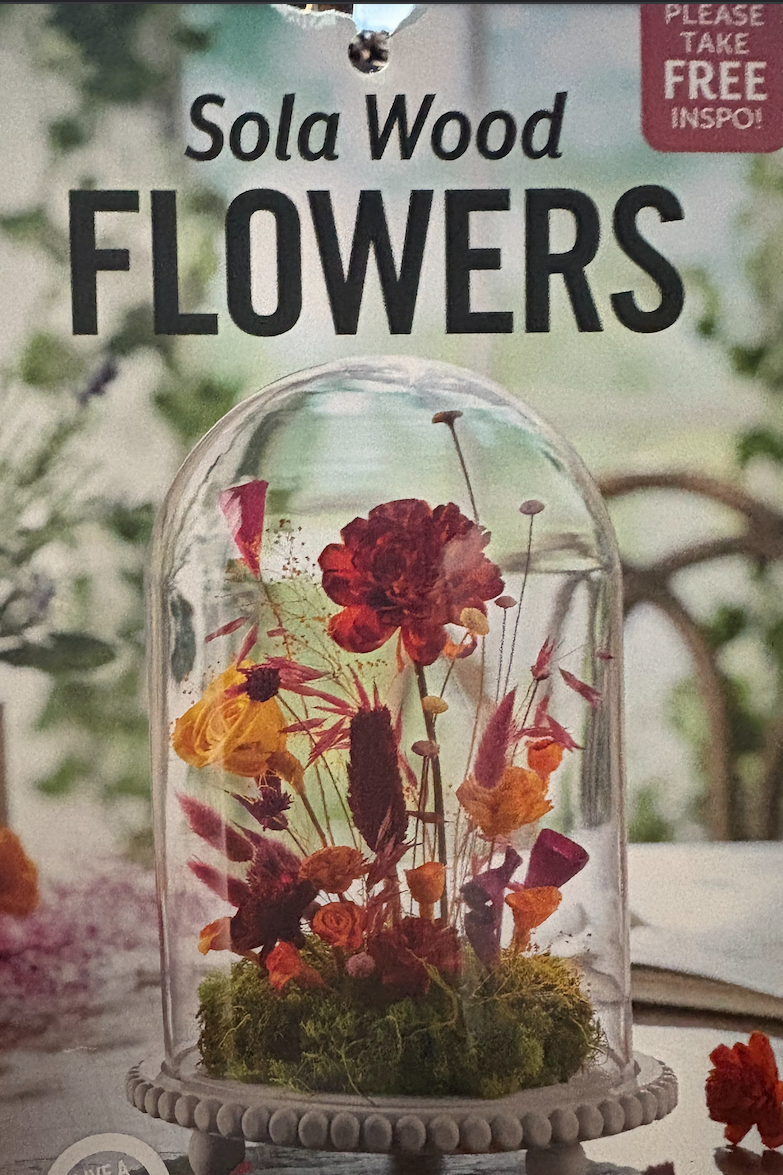
Hobby Lobby Design Inspo
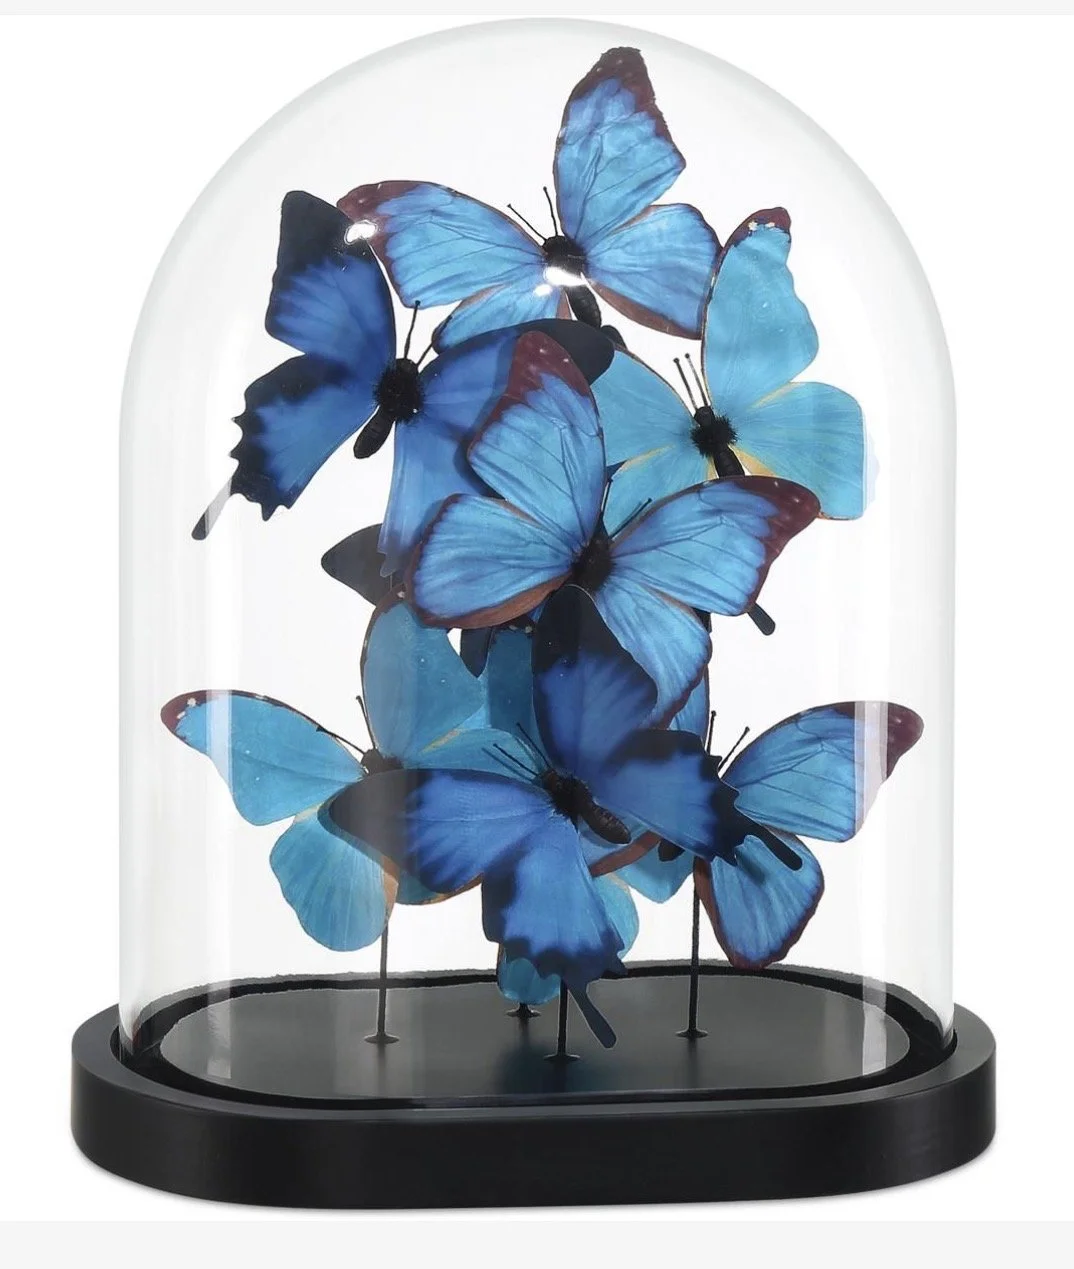
Sample_ Butterfly Only Display
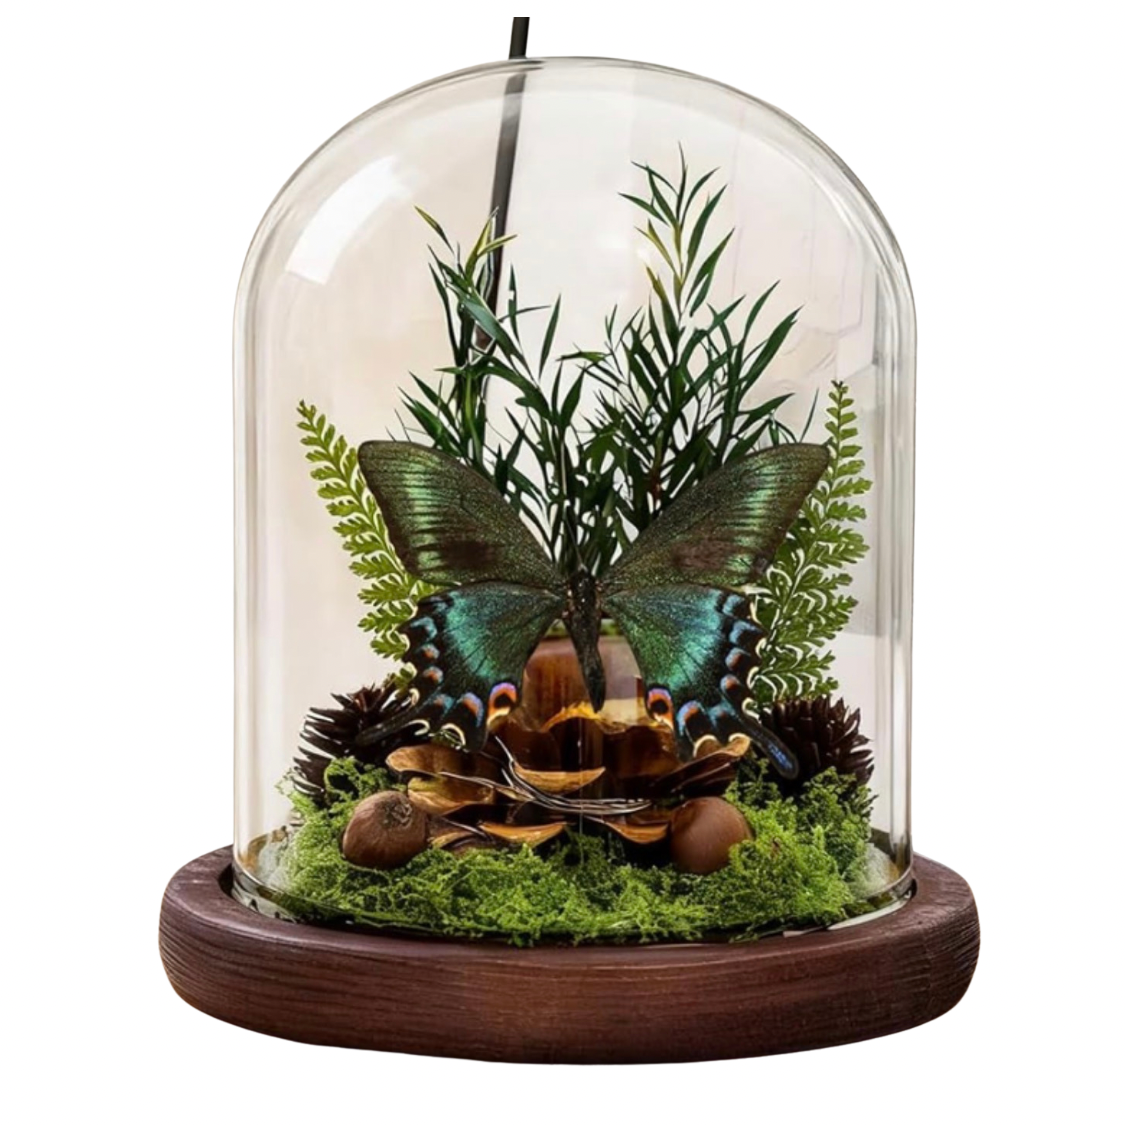
Sample_Nature Style Display
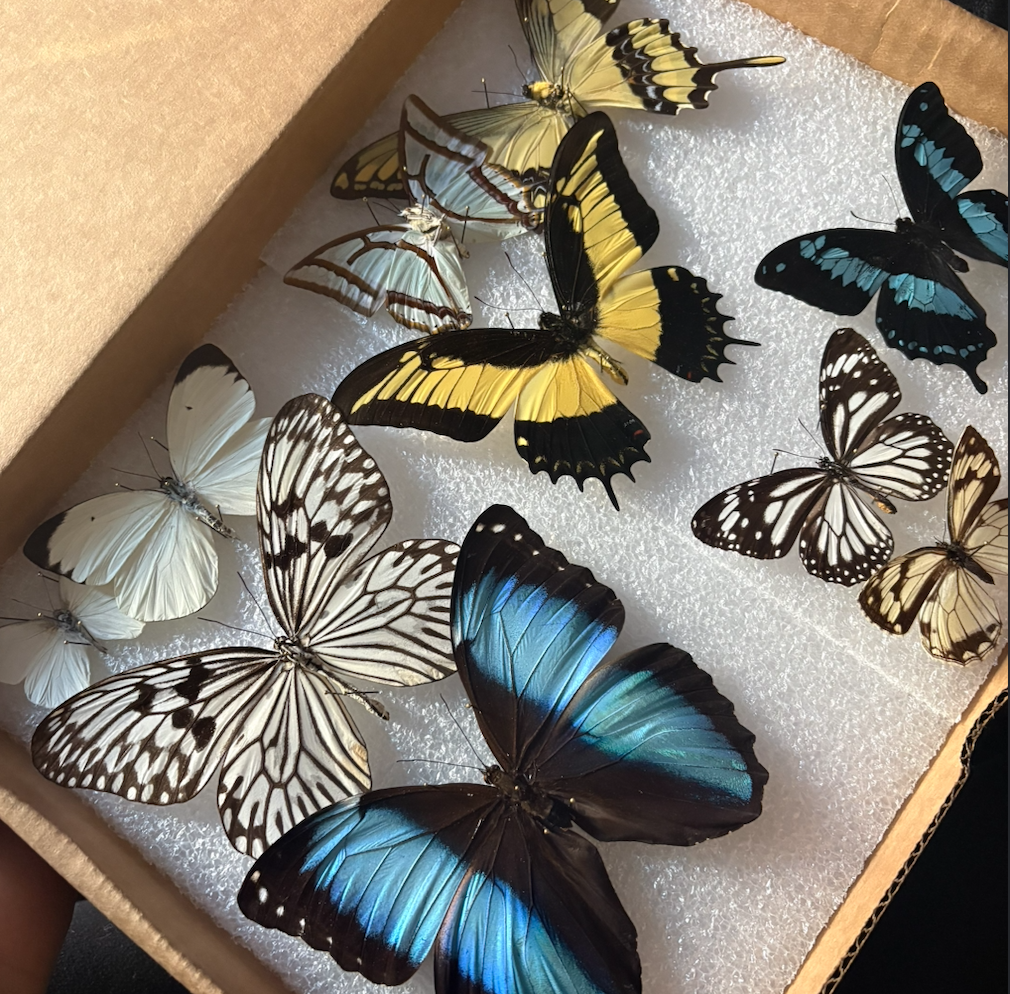
Shipment of Unfolded Butterflies
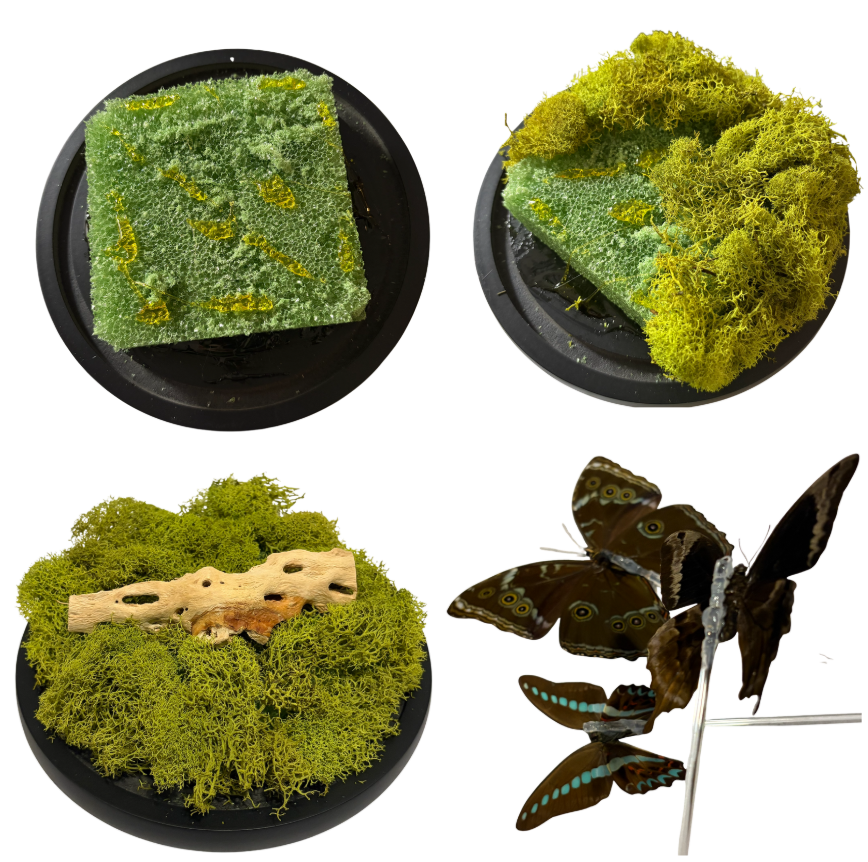
A Few of the Detailed Steps
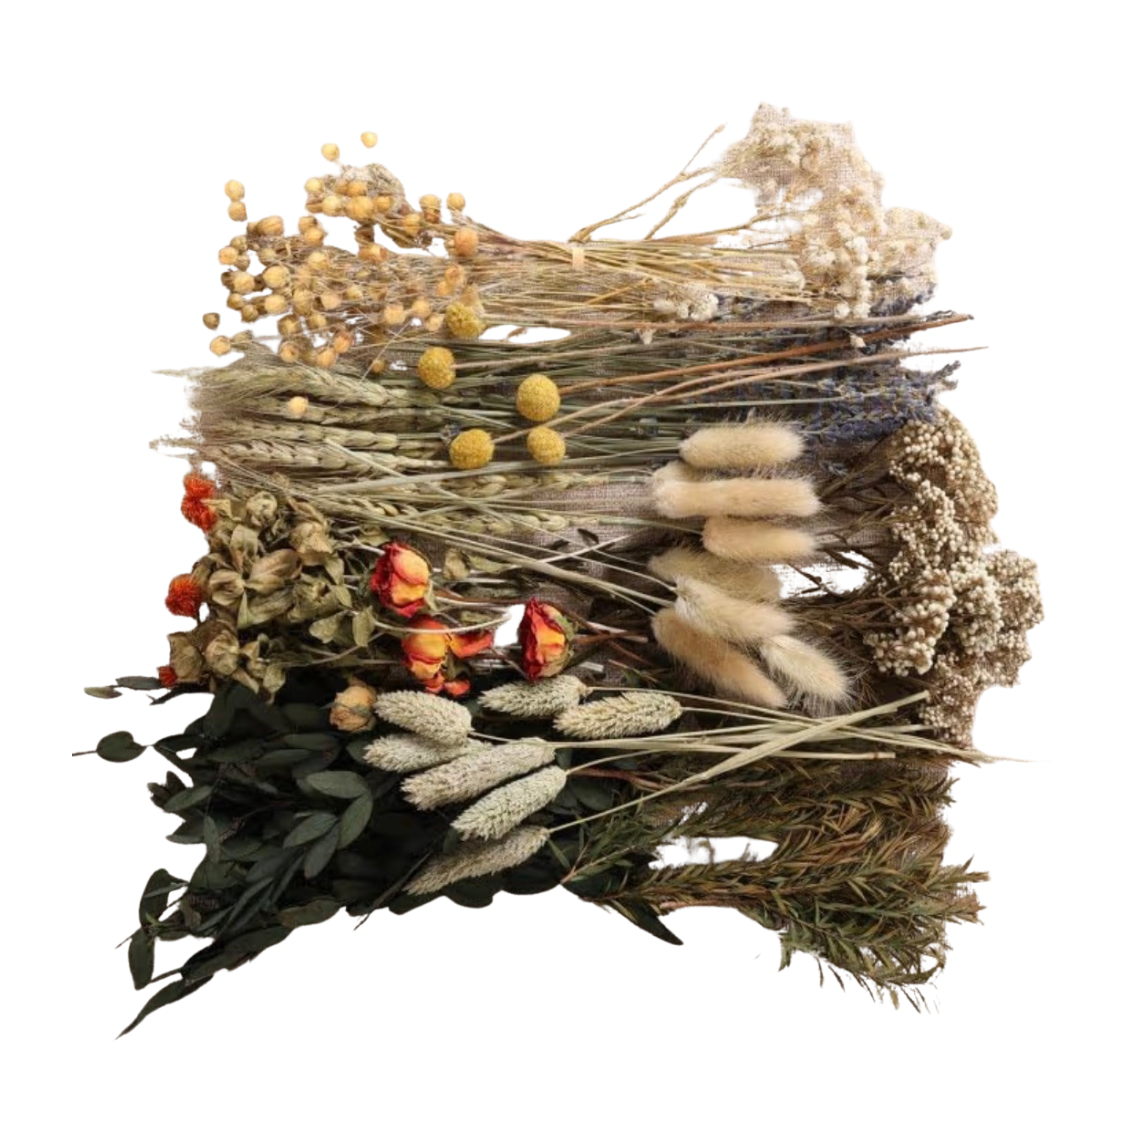
Link to Simple Floral Bunch
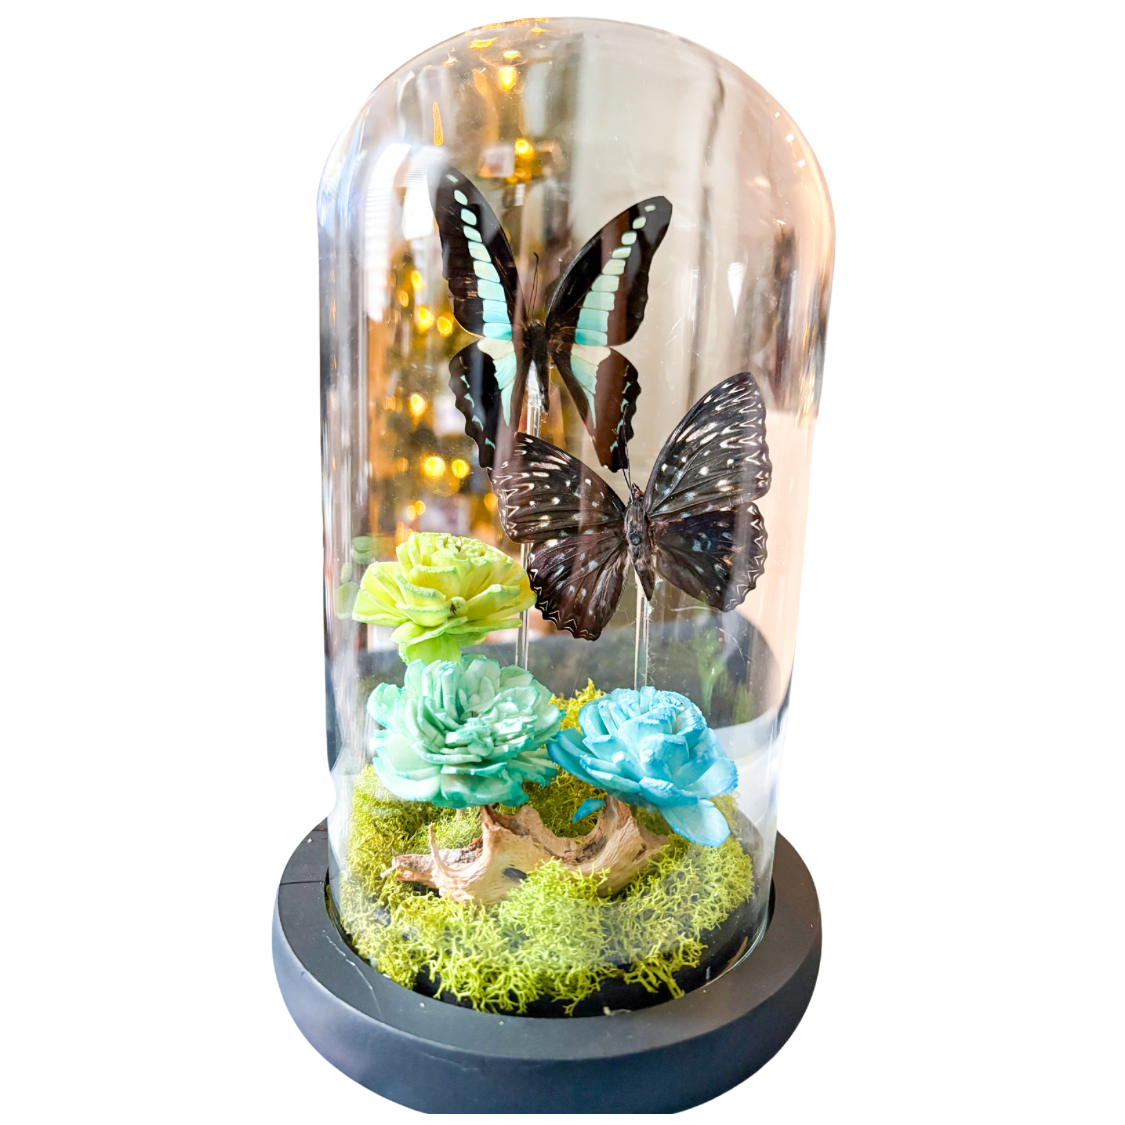
Secret Santa Display

Just 4 Fun
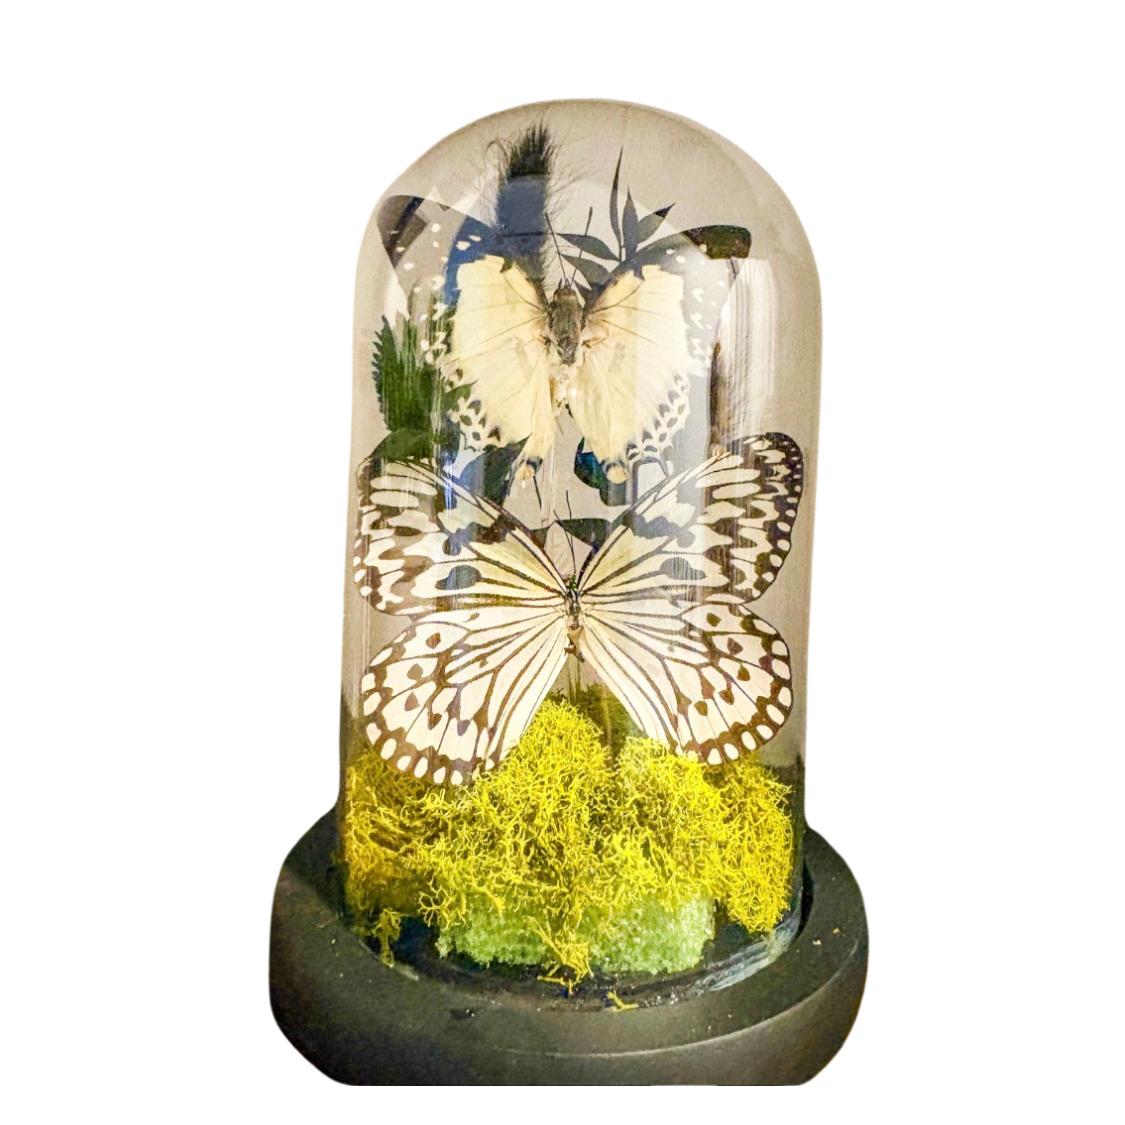
All White Butterfly Display
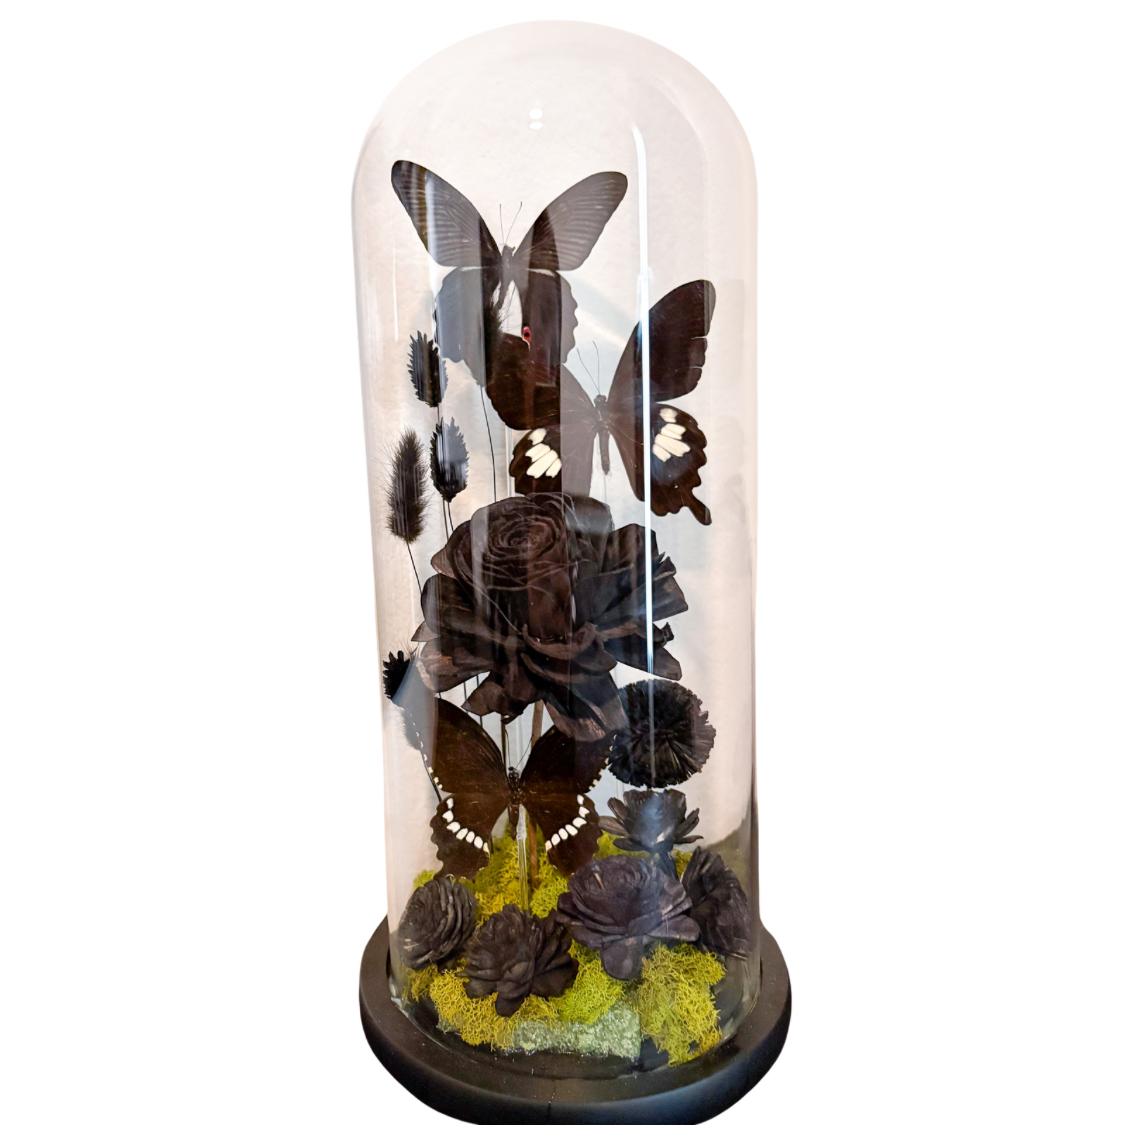
My Pride and Joy All Black